
How to Read a Lake Map for Fishing
Stop seeing contour lines as clutter. Learn how to turn a lake map into structure, relationships and places worth investigating.
The first time you open a detailed contour map of a lake, it can look like somebody spilled a bowl of spaghetti across your screen.
Lines everywhere.
Numbers. Shapes. Colors.
Maybe you already know the basic explanation:
Contour lines connect areas of similar depth.
Great.
But that doesn’t answer the question you actually care about:
Where should I fish?
Learning to read a lake map isn’t really about memorizing contour lines.
It’s about learning to look at those lines and picture the lake bottom underneath the water.
Once you can do that, a flat screen starts turning into something more useful:
- A point
- A drop
- A creek channel
- A hump
- A travel route
- A place where shallow water meets deep water
And eventually:
A place worth making a cast.
First: What Is a Lake Contour Map?
A lake contour map—sometimes called a bathymetric or depth map—is essentially a topographic map of what’s underneath the water.
Each contour line represents a particular depth or elevation.
Imagine draining the lake.
The hills, valleys, ridges and channels you’d see across the exposed lake bottom are what the contour lines are trying to show you.
Think of it as a map of underwater land.
If you can read hills and valleys on land, you can learn to read structure underwater.
How to Read Contour Lines
There are two things I look at first:
Tight Contour Lines = Faster Depth Change
When contour lines are packed closely together, the bottom is changing depth quickly.
Think:
Steeper slope.
For example, if the map goes from 5 feet to 10 feet to 15 feet within a very short horizontal distance, you’ve found a relatively steep break.
That matters because fish can move between depth ranges without traveling very far.
From a kayak, it can also give you an efficient area to investigate because several depths may be within casting distance.
Wide Contour Lines = Gradual Depth Change
When the lines are farther apart, the bottom changes more gradually.
Think:
Flat or gentle slope.
That doesn’t automatically make the area bad.
A giant flat may be extremely productive.
But now I want to ask another question:
What interrupts the flat?
Maybe there’s a small ditch.
A subtle depression.
A secondary point.
A small rise.
A nearby creek channel.
A tiny structural difference across a huge area of otherwise similar water can sometimes be more interesting than an obvious feature everybody notices.
Learn These Core Shapes First
You don’t need to recognize every possible underwater feature before contour maps become useful.
Start with a handful.
Points
Contour lines extend outward from shore toward deeper water, like a ridge running down into the lake.
Offshore Humps
Closed contour lines with shallower water toward the center and deeper water around the outside.
Creek Channels
Deeper winding routes running through shallower surrounding water.
Channel Swings
Places where a creek or river channel bends toward another structural feature.
Steep Breaks
Tightly packed contour lines showing rapid depth change.
Flats
Broad areas of relatively similar depth where the contour lines are spaced farther apart.
Junctions
Places where multiple structural routes or features intersect.
Cove Mouths
Transitions between protected shallow water and the larger lake.
1. How to Find Points on a Lake Map
A point is a piece of land or underwater structure extending outward toward deeper water.
On a contour map, you’ll usually see the contour lines extend outward from shore.
Think of a ridge running down into the lake.
Points can be useful because they give fish access to multiple depth ranges along one structural feature.
But there’s an important catch:
Once you’ve found the point, ask:
- Which side is steeper?
- Where is the deepest water?
- Is there a creek channel nearby?
- Is there a secondary feature?
- Does one side offer better depth access?
Identifying the point is step one.
Finding the best part of the point is step two.
2. How to Find Offshore Humps
A hump is essentially an underwater hill.
On a contour map, you’ll usually see closed contour lines with shallower water toward the center and deeper water surrounding them.
A common mistake is finding the center of the hump, dropping a waypoint there and assuming you’ve found the spot.
Not necessarily.
Look at the entire feature.
- Where is the sharpest edge?
- Which side reaches deep water fastest?
- Is there a saddle connecting it to another feature?
- Does one side face a creek or basin?
3. How to Find Creek and River Channels
This is where imagining the lake without water becomes especially useful.
Before many reservoirs existed, creeks and rivers ran through the landscape.
Flood the valley and those old routes don’t disappear.
They’re now underwater.
On a contour map, creek channels often appear as deeper routes winding through shallower surrounding water.
Instead of treating the entire channel as a fishing spot, think of it as a route.
Then look for places where that route interacts with something else.
Useful Relationships
The route becomes more interesting when it meets structure.
4. How to Recognize Channel Swings
A channel swing occurs where a creek or river channel bends toward another structural feature.
These areas can create fast depth changes and useful structural relationships.
But again:
Follow the route until something changes.
- A bend
- A point
- An intersection
- A pinch
- A sharper edge
That’s where I’d start looking closer.
5. How to Read Steep Breaks
You already know how to recognize these:
Tight contour lines.
But an entire steep break can run hundreds of yards.
So don’t stop at:
There’s a drop-off here.
Ask:
Where does the drop-off become different?
- A bend
- A point
- A pinch
- A transition
- Another structure intersecting it
- An irregularity in otherwise uniform contours
Once again:
The feature inside the feature.
6. How to Read Flats
Flats are broad areas where the depth changes relatively slowly.
The contour lines will usually be spaced farther apart.
The problem with a flat is its size.
Fish the flat isn’t very helpful when the flat covers 50 acres.
Instead, look for secondary changes:
- A ditch through the flat
- A small hump
- A depression
- An edge
- A point
- A creek route
- A sharper contour
The secondary feature helps you decide where to stop.
7. How to Read Junctions
Junctions are places where structural routes or features come together.
Maybe a secondary creek channel joins the main channel.
Maybe a point intersects a creek route.
Maybe a creek arm opens into the main basin.
These locations interest me because fish have options:
- Different depths
- Different routes
- Different nearby structures
But a junction can still cover a large area.
So once you’ve identified it, zoom in again.
Look for the best secondary feature inside the junction.
8. How to Read Cove Mouths
A cove mouth is the transition between protected water inside a cove and the larger lake.
Instead of simply marking the middle of the opening, inspect what’s happening underneath it.
- Does a creek route leave the cove?
- Is there a point on one side?
- Where is the first meaningful depth change?
- Does one side connect to deeper water faster?
The structural relationship inside it tells you where to investigate.
Don’t Confuse Structure With Cover
This distinction makes contour maps much easier to understand.
Structure
The shape of the lake bottom: points, humps, channels, flats, breaks, ledges and depressions.
Cover
Objects located on or around structure: brush, timber, vegetation, docks, rock and laydowns.
Imagine an underwater point with a brush pile sitting on it.
The point is structure.
The brush pile is cover.
Both can matter.
But they’re different pieces of information.
A contour map is primarily helping you understand structure.
Then, once you’re on the water—or have another reliable source of information—you can verify what cover or bottom composition is actually present.
The Biggest Map-Reading Mistake: Looking at Features Individually
Here’s where we move beyond basic contour-map reading.
Suppose you find a point.
Good.
Then you find a creek channel.
Good.
Then you find a steep break.
Also good.
But now imagine all three occur in the same location:
That gets my attention much faster.
Why?
The point creates structure.
The channel provides a route.
The depth change gives fish quick access to different depths.
That’s what I mean by a structure relationship.
And this is where contour maps start becoming much more useful.
Where are the points?
Start asking:
Which points have something else going for them?
Good Structure Is Useful. Structure Relationships Are Better.
Point + Channel
A structural feature sitting beside a logical movement route.
Hump + Basin
An offshore high spot with quick access to deeper water.
Cove Mouth + Route
Protected water connecting to a movement corridor.
Junction + Secondary Feature
A major intersection with a smaller feature telling you where to focus.
Flat + Secondary Change
A large area of similar depth interrupted by something different.
Point + Steep Side
A point where one side gives fish faster access to deeper water.
This doesn’t mean fish will automatically be there.
We’re not using a contour map to prove fish exist somewhere.
We’re using it to identify locations that give us more reasons to investigate.
Want to Turn Map Reading Into a Repeatable Fishing Plan?
Start Big and Keep Zooming In
Here’s a simple way to practice reading any lake map.
Don’t immediately start dropping waypoints.
Instead, work through the map in layers.
Lake
Look at the entire body of water. Where are the basins, creek arms, major flats and deepest areas?
Zone
Which section of the lake makes the most sense for the season and conditions you’re fishing?
Structure
What major points, humps, channels, breaks, junctions or transitions exist there?
Spot
What part of that structure has the strongest relationship with depth, routes or another structural feature?
Cast
Where should your kayak be positioned so you can actually investigate it?
Now you’re not just reading contour lines.
You’re turning the map into a fishing plan.
A Simple Exercise: Compare Two Points
Open a lake map and find two points.
Don’t ask which one “looks fishier.”
Compare them deliberately.
Point A
Gradual slope. Similar contour spacing on both sides. No obvious creek route nearby. Few secondary structural changes.
Point B
One side drops quickly. Creek channel passes nearby. Point intersects multiple depth bands. Secondary irregularity near the channel side.
Which one would you investigate first?
Point B.
Does that mean fish are definitely there?
No.
It means Point B gives us more reasons to investigate before Point A.
The Map Is a Hypothesis, Not a Fish Report
A beautiful contour map can tempt you into believing you’ve solved the lake from your couch.
You haven’t.
You created a plan.
Once you reach the location, you still need to verify what’s actually happening.
Maybe the contour map is old.
Maybe the lake is several feet low.
Maybe the brush you expected isn’t there.
Maybe there’s no bait.
Maybe the wind has made one side much more interesting.
Medium map score + strong evidence = stay.
The map gets you there.
The lake decides if you stay.
What If the Lake Level Is Different From the Map?
This is especially important on reservoirs.
Contour maps are typically based on a reference elevation or water level.
If the lake is currently lower than that reference, the actual water depth over a feature may be shallower than the number printed on your map.
For example, if your map was based on normal pool and the lake is approximately two feet below that level, a mapped 10-foot location may be closer to roughly 8 feet under those simplified conditions.
But don’t obsess over getting every number perfect.
The structure relationship remains.
A point beside a creek channel is still a point beside a creek channel.
A steep break is still a steep break.
Always verify actual conditions and depth on the water.
You Don’t Need Expensive Electronics to Start Doing This
Electronics can absolutely help.
Sonar can help verify:
- Depth
- Bait
- Fish
- Bottom changes
- Cover
But the thinking process begins before any of that.
You can learn a tremendous amount from a contour map before your kayak ever touches the water.
That’s one of the reasons I like this approach for kayak fishing.
You’re replacing random searching with intentional investigation.
You don’t need the technology to tell you:
Fish here.
You’re asking:
Why is this place worth checking?
That’s a skill that gets better every time you fish.
From Reading Maps to Finding Spots
Knowing how to identify a point is useful.
Knowing how to identify a creek channel is useful.
Knowing that tight contour lines indicate faster depth change is useful.
But those aren’t the end goal.
The end goal is being able to look at a lake and say:
There are 30 points on this lake.
Six are in the zone I care about.
Three have strong depth and route relationships.
And this one gives me the best reason to start.
That’s when you’ve gone from reading a map to making fishing decisions.
Frequently Asked Questions About Reading Lake Maps for Fishing
What do contour lines mean on a fishing map?
Contour lines represent depth or elevation across the lake bottom. Their shape helps reveal underwater features, while the distance between the lines helps show how quickly the bottom changes depth.
What do close contour lines mean on a lake map?
Closely spaced contour lines generally indicate a faster change in depth or steeper slope. Widely spaced contours indicate a more gradual depth change.
How do you find a point on a lake contour map?
Look for contour lines extending outward from shore toward deeper water, similar to a ridge extending down a hillside. Then compare the sides of the point to see where depth changes fastest and whether other features intersect it.
How do you find an underwater hump on a lake map?
Look for closed contour lines surrounded by deeper water, with shallower depth toward the center. Rather than automatically fishing the crown, inspect the hump for steep edges, saddles and relationships with nearby deep water.
How do you find creek channels on a fishing map?
Look for deeper, winding routes running through shallower surrounding water. Think of the channel as an underwater valley or movement route and pay particular attention to bends, junctions and places where the channel approaches other structure.
Are tight contour lines better for fishing?
Not automatically. Tight contours indicate faster depth change, which can be useful, but the strongest fishing candidates often combine depth change with another structural feature or route.
What is the difference between fishing structure and cover?
Structure describes the physical shape of the lake bottom, such as points, humps, channels and breaks. Cover refers to objects associated with those areas, such as brush, timber, vegetation, docks or rock.
Can you find good fishing spots without a fish finder?
Yes. Contour maps, visible shoreline features, water level, wind and observation can help you identify promising places before launching. Electronics can make on-water verification easier, but they aren’t required to begin understanding structure and making better fishing decisions.
Stop Saving Random Waypoints.
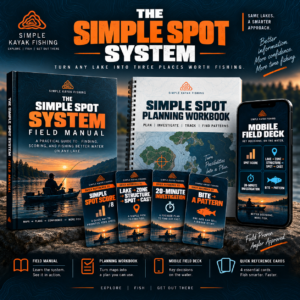
The Simple Spot System takes map reading one step further.
Learn how to compare potential spots using Structure, Depth, Route and Complexity, narrow a lake to three places worth fishing, investigate each spot on the water and turn a bite into a repeatable pattern.
- Field Manual
- Planning Workbook
- Mobile Field Deck
- Quick Reference Cards
- Complete /8 Simple Spot Score
- Core structure guides
- 20-Minute Investigation
- Bite → Pattern method